
FOOD STYLING & PHOTOGRAPHY

 Update, as of November 2016:I just published a brand new guide to food styling & photography (for food bloggers!) that captures everything I've learnt over the 2 years since I wrote this post below. My new guide is a 5 day email course (that is totally free) where we explore narrative, light, composition, colors, props and styling techniques, complete with image examples, checklists, adult homework and aaall my best food blogger hacks to make everything as smooth as possible for you. Click HERE to sign up.It's time to dig deeper into the subject of food styling & food photography! I have a looot to go through, so let's skip the small talk and start right away!
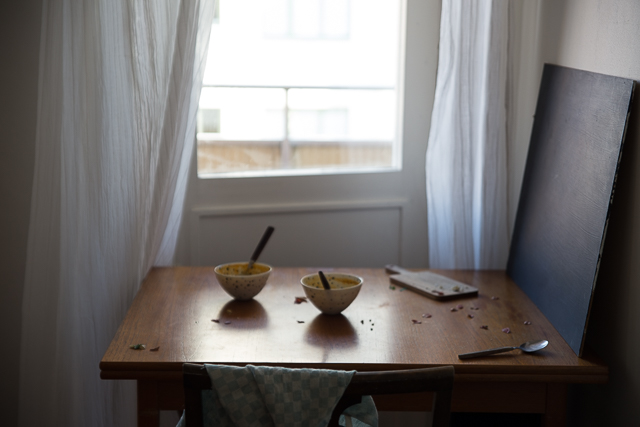 If you have been following me on Instagram for a while, you know how much I love dark backgrounds. I have one board painted dark blue that I use in pretty much all my photos. The pictures below are just a tiny fraction of 'em.
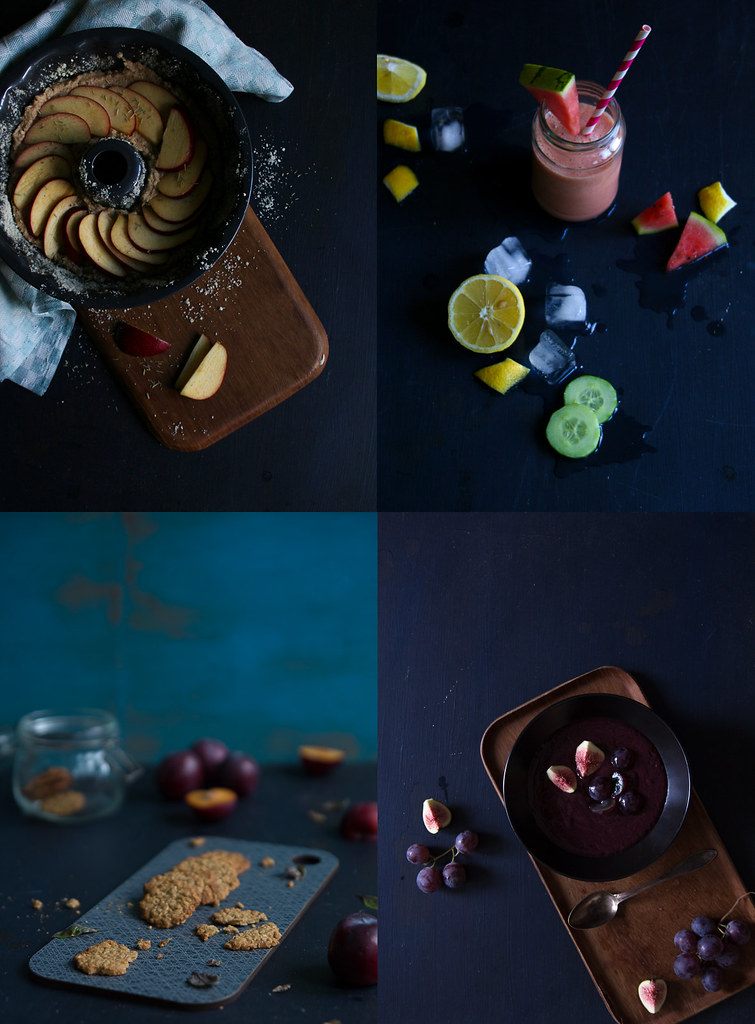 NarrativeSo basically my process begins with thinking about the food I'm about to photograph: how does it look? (colors, textures etc.) What situation and mood do I want the image to perform? And from that I chose background (table, wooden planks, cutting board etc.) and backdrop (wall, board, curtain, window etc.). Mostly I think in colors and light, because that's how my initial ideas takes form in my head, and less about narrative. Or I guess it is a sort of narrative, it's just that the story in my photos is a static one. Frozen. While some people might wanna convey, let's say, a family dinner which has a time dimension. You'll just have to figure out what's your thing, and who you imagine will be looking at your pictures. Like I wrote in the post about Sonja's workshop, I’m looking for that eerie sense of being inside an abandoned cottage where time has been standing still for hundreds of years. A cracking radio and rain patting on the window glass. Seasons passing. I guess Tranquility is what I try to convey.PropsOkay so now I know the story I want to the photo to tell. Time to chose props! Most of my props I find on flea markets. Some in department stores and kitchenware stores. Nothing expensive, mostly just old crap nobody wants. Btw the table below is one I built & treated myself *proud*. If you don't want to build your own backgrounds, flea markets, grandma's, construction sites (you didn't hear it from me...) and storage rooms are good places to look.
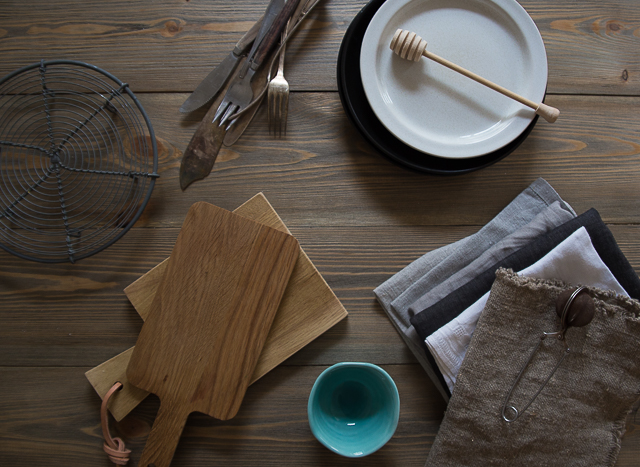 Props doesn't have to be typical "kitchen stuff". It can also be books, flowers, old newspapers, or anything else suitable for the narrative (or for practical matters, like elevating a piece of cake).
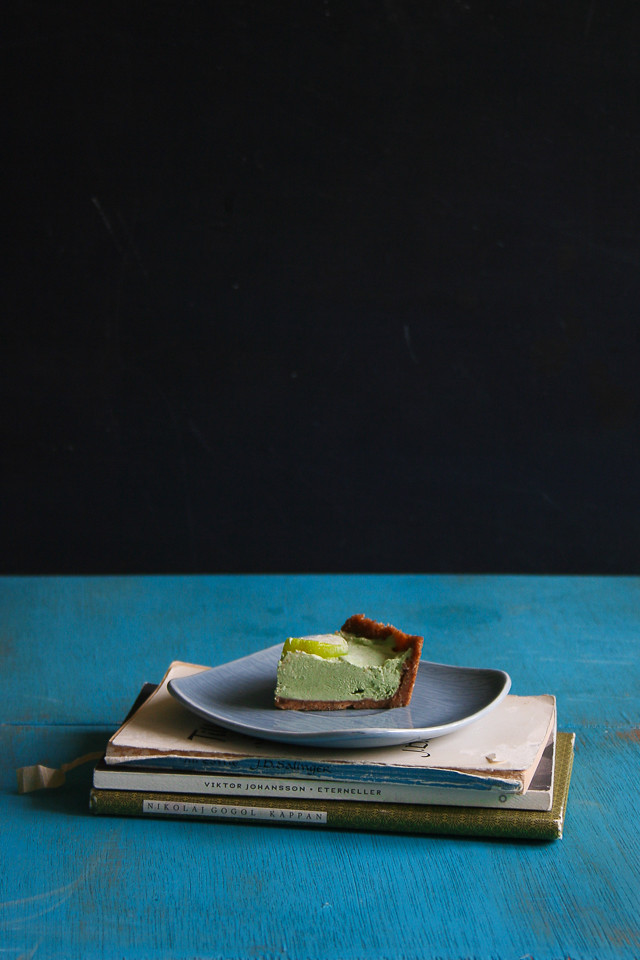 ColorsI work a lot with complementary colors. It's an easy trick to create interesting color play that are comfortable to the eye. Blue vs. yellow/orange is classic.
 However, lately I've moved away a bit from those vibrant colors and worked more with textures, natural materials and light, using monochrome colors or similar colors in slightly different shades.
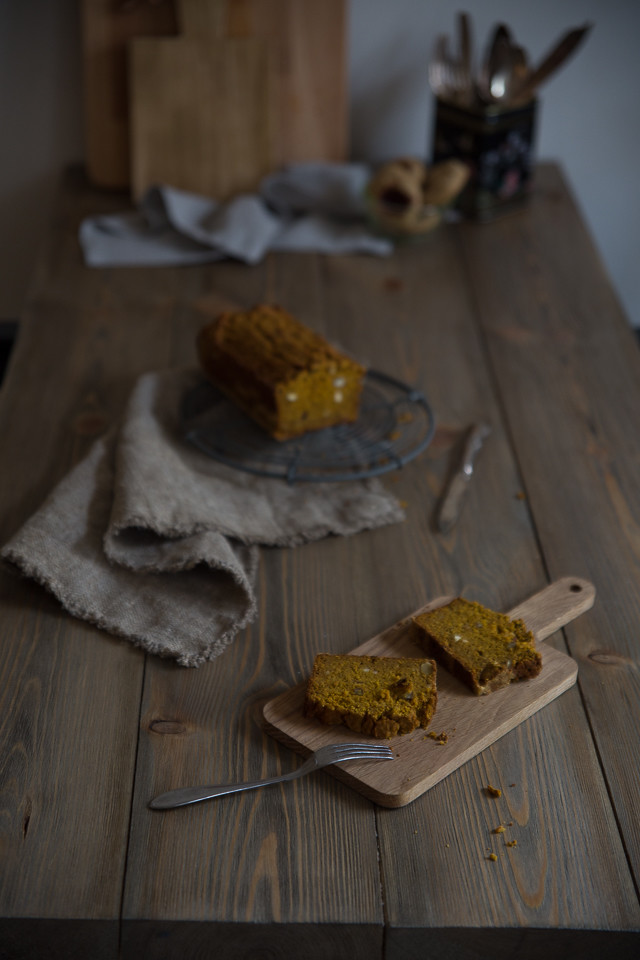 LightBefore setting up your foodie story/still life, you need to get to know the light in your home/studio. Which direction does your windows face? How does the light play out during the day? When is it too dark and when too light to take pictures? For example my apartment has windows in northeast direction, which is good because it means the light is mild with hardly no direct sunlight. I always photograph with natural light coming from one side, switching of all other lamps in the room (even one light bulb on in the corner somewhere can produce a yellowish glow in the image). I don't worry too much about dark parts in the photos, and hardly ever use reflectors. Personally I like the contrast and depth that side-light creates.
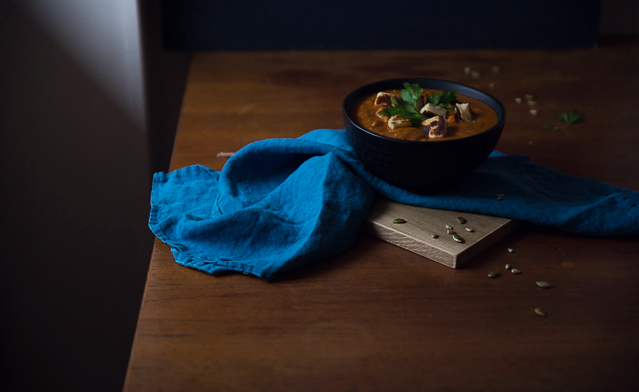 CameraOnce I know my location (In my case I only have two options; in front of the balcony door or the window), have chosen my background and props, I roughly prepare the styling. Where to put the plates, the fabric, forks etc. Mostly I change this during the photo shoot, but sometimes I'm photographing something critical like hot steaming soup or ice cream, and then everything has to be prepared in detail.I snap a couple of pictures to get the camera settings right. The only good tip I have on how to learn how your camera works is to read the manual, learn how ISO, shutter speed and aperture works together, and take lots of photos to practice. I'm really just a beginner with all these camera functions.I use a Canon EOS 6D (a full-format camera) with a Sigma 24-70mm f/2.8 lens. 24-70mm represents the focal length. 2.8 is the aperture and it tells me I can get a fairly short focal depth. The lower the number the shorter the focal depth. I've noticed that many food photographers use f/1.4 with a 100 mm zoom or stable lens, but I chose the 24-70mm because my apartment is so small that if I step back too much to fit more into the frame then I just run into the opposite wall haha. No but seriously, 24-70mm is a good, all-around lens!Below are two test-photos. To the left I was gonna dust powdered sugar over the food, and needed something to set the focus on beforehand. To the right I was gonna shoot soup with garnish on top that quickly sink into the soup, so I had to be prepared with the styling and camera settings.
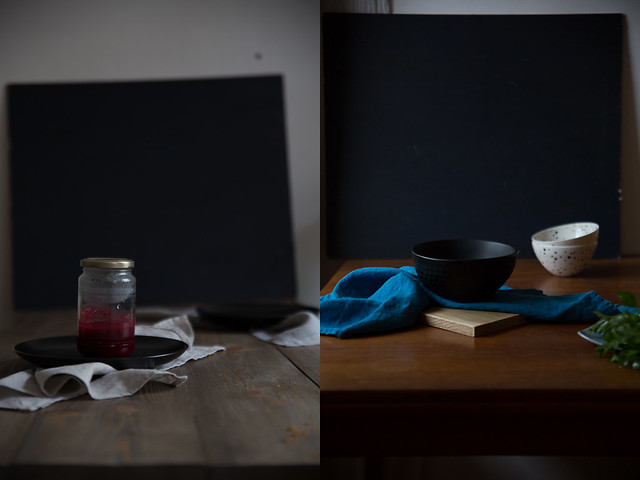 In the two photos further below you can see an example of two different camera settings for the sugar dusting. In both cases I stacked a couple of moving boxes to put the camera on (...really need to get a tripod...), and then shot with the camera's self-timer function. Left one had a low ISO and fairly slow shutter speed. Well that didn't work, obviously. So then I increased the ISO to be able to shoot with a very quick shutter speed. That worked better. Still not perfect, but heck! it was the first time I dusted sugar in a photo. The relation between ISO and shutter speed (and aperture) decides how bright or dark the picture becomes. Generally, increasing ISO like I did in the image to the right would produce a brighter photo, but the very quick shutter speed made up for that.You'll probably see these photos edited and ready in a coming blog post : )
 Composition & StylingOkay so now we have the light figured out, camera settings done and our props for styling picked out.I'm not sure how other people do it, but I always try to frame the photo the way I want it from the beginning in the camera, doing minimal cropping afterwords in Lightroom. I look through the lens to see if the composition works out the way I want it to. Let's analyze the composition and styling from a couple of photos I'm satisfied with.The picture below is made up almost entirely out of form and composition, and hardly no props at all. The composition in this picture is an example of the golden ratio, and the elements are placed along a diagonal line. When such a large part of the photo is out of focus, what remains are planes, shapes, lines and colors. Almost like a painting. It is also very actable to only work with two colors like this.
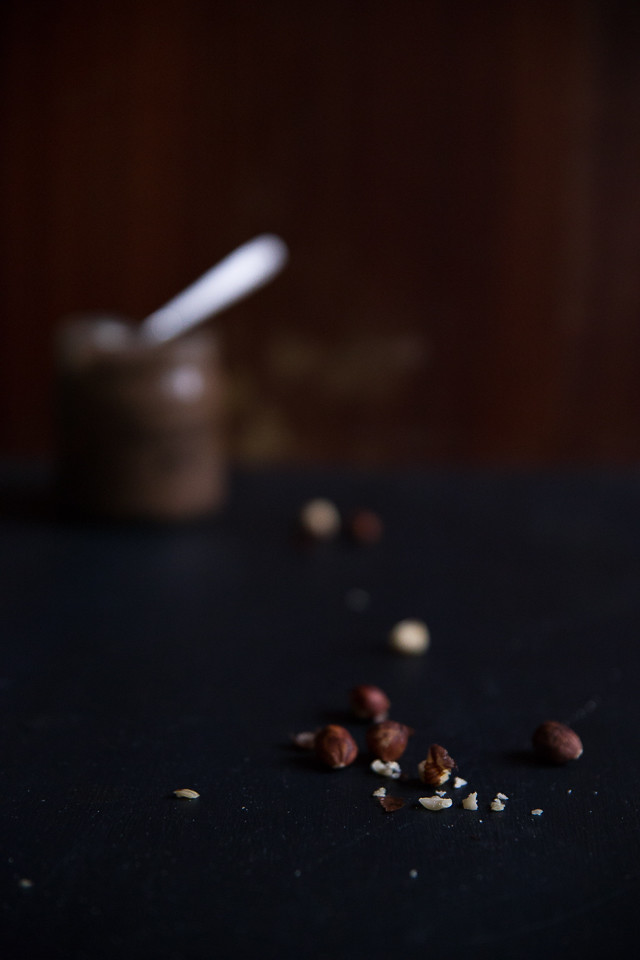 When arranging the food and props in my photos, I think about what shape I want them to make up. Usually it is an S, a / or even an % (two bowls with a twisted towel in between ; ). Balance is also important. You need busy as well as negative, "resting" space. If some area feels too empty when looking through the lens, I toss a couple of seeds or place a spoon there or something.Uneven numbers usually creates more "open", continuous shapes, even numbers a more closed composition. In the photos below I used a very small bowl (Great tip! Small things tend to look prettier in pictures), and lots of different leaves and herbs and nuts to make it look a little messy. The 3/4 angle and diagonal cutting board in the left picture creates depth. The vignette and side-light in both images creates intimacy. The warm colors provides an autumnal feeling. The glowing, blue background in the left picture contrasts the warm colors. Sorry for the geekiness here. I think my year spent on analyzing "hidden meanings" in renaissance paintings at the university when I was like 21 is making itself reminded...
 I love shooting simple produce, because fruits and veggies and greens are so incredibly beautiful on their own. Including photos of the ingredients on their own, or photos when actually harvesting the produce, creates a local, from-farm-to-table kind of feeling.
 My photographing process usually involves me climbing on chairs taking pictures from every possible angle, focus and focal depth, then having to go through a copious amount of almost identical photos. I'm working on thinking quality rather than quantity...Then I import the photos to Lightroom and edit. Is the editing part something you're even interested in?? I'm not sure I'm that good at editing photos so perhaps I'm not the right person to ask about that stuff, but if you're interested I can of course write something in the future on the subject too.Before wrapping up this post, I thought I'd share one of the very first "serious" food photographs I took. It was only a year and a half ago! Back then I knew nothing about styling and light. Below is a rye bread for my very first blog post (for the old blog). Shot outdoors (in sunlight!) in a canopy in the woods. Sounds lovely, but look at the horrible green light. It's like I photographed inside a camping tent! Also obviously knew nothing about white balance or editing either.
 But simply by taking lots and lots of photos, I got better. Sometimes it feels like it's impossible to create something good. The next day great photos almost creates themselves. I still consider myself an amateur, so these tips are just the way I do things. In a few year's I'm hopefully a pro ; )A few people who's food styling really inspire me are Linda Lomelino (her latest book have a great section on styling & photography), Beth Kirby of Local Milk, David & Luise of Green Kitchen Stories, Sonja Dahlgren of Dagmar's Kitchen, Emily Dahl of Milk & Arsenic, Evelinas Ekologiska, Nora & Laura of Our Food Stories, Susann & Yannic of Kraut Kopf, Suus of Food Bandits and Marta Greber of What Should I Eat For Breakfast Today, to name just a few of all amazing food photographers out there! Also, check out Sandra for another great guide on food photography. Find more links in the sidebar to your right.Update: From October 2017 and onwards I now offer private workshops in food styling and photography in my home. Click here to read more. For those of you not living in Stockholm, Sweden, I offer 1-1 coaching sessions instead. Anyway, I've tried to be as thorough as I could in this post. I hope this was helpful and maybe even a tiny bit interesting? I'm really curious about if you found this post helpful! Please let me know what you think : ) And if anyone of you write anything about your own styling and photographing routine I'd love to read it!Until next time xxAll photographs, recipes and content are Cashew Kitchen originals, unless otherwise indicated. Please link back to me when sharing.